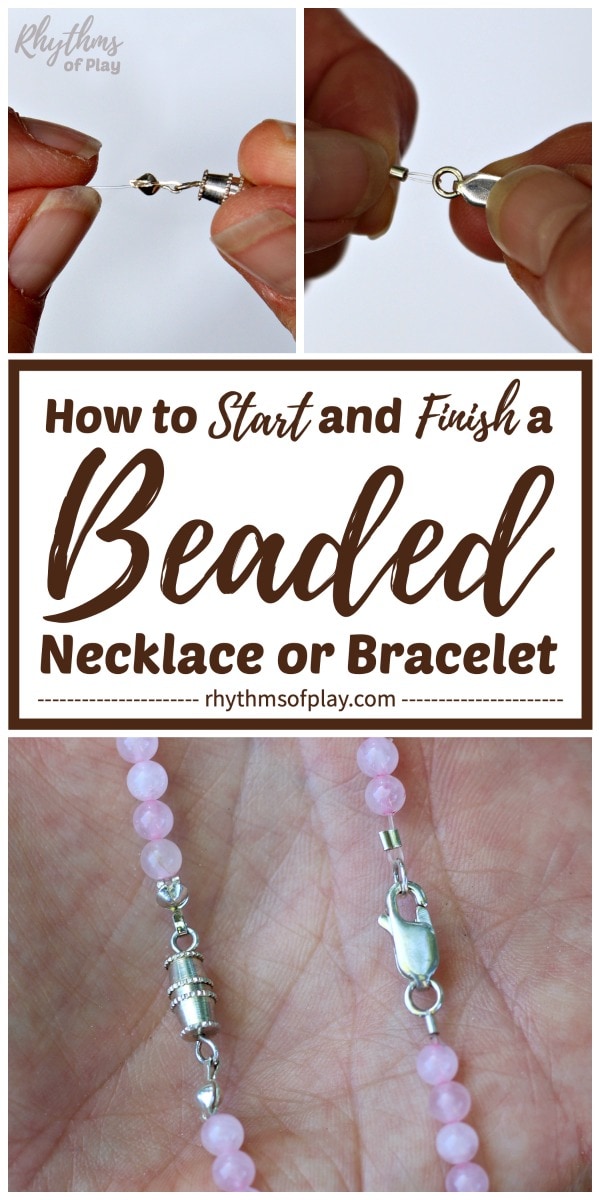
Easy Way to Pit on a Bracelet With a Big Clasp
Learn how to make a beaded necklace or bracelet with 3 Easy DIY jewelry-making tutorials for beginners.
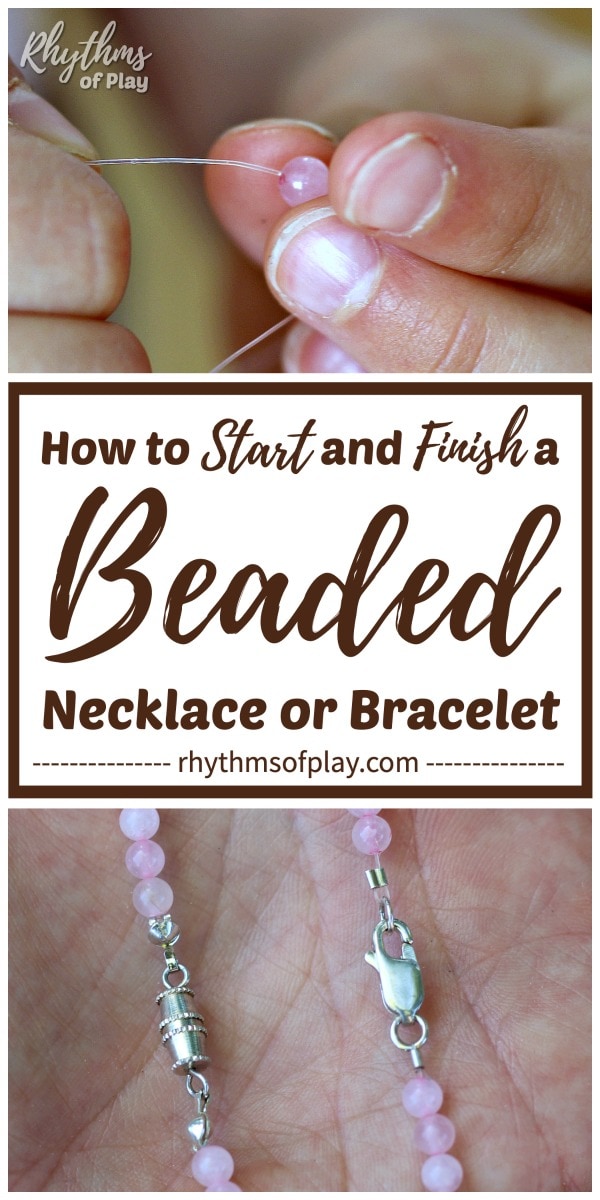
This beginner's jewelry-making guide teaches how to make a necklace or bracelet, or more specifically, it gives complete instructions (with photographs) for how to start and finish a beaded necklace or bracelet. However, this is not just one tutorial for one jewelry-making method or technique. Instead, this beaded jewelry-making guide includes three step-by-step tutorials–for three different, but easy methods, to start and finish a beaded necklace or bracelet; infinity, clamshell knot covers, and crimp beads and pliers.
A step-by-step jewelry-making tutorial for each jewelry-making method with supply lists follows this brief introduction. Scroll down to learn how to do each simple beaded jewelry-making technique, and choose one to get started creating your own beautiful beaded art. Affiliate links to jewelry and bead supplies, fun projects, and other beginning jewelry-making resources are included for your convenience at the bottom of the post and sprinkled throughout the article. We can't wait to see your beaded creations!
Related: Mother-Daughter Necklace Set DIY
Related: How to Make a Prism Suncatcher
How to Make a Beaded Necklace
Learn how to make a beaded necklace or bracelet in three easy ways with the detailed step-by-step tutorials below. Jewelry making has been a favorite hobby of mine since I was a small child, and I even spent a few years selling handmade jewelry at fairs and farmers' markets for a profit in my younger days. The first items I learned to make were simple beaded necklaces and bracelets.
Today my daughter is learning how to make beaded necklaces, bracelets, suncatchers, and other beaded jewelry the same way I did. We even made a beaded sea glass wind chime together! Scroll down to learn how to start and finish a beaded necklace or bracelet. You can see my daughter's kindergarten-aged young hands at work beading a mother's day gift she made me in the image below.
Related: How to Make Beaded Snowflake Ornaments
3 Easy Ways to Start and Finish a Beaded Necklace or Bracelet
These DIY jewelry-making tutorials and ideas are perfect for beginners of all ages. Below are three easy ways to start and finish beaded jewelry:
- Infinity
- Clamshell knot covers
- Crimp beads and pliers
How you start and finish each beaded necklace or bracelet will depend on the materials you are using, the available supplies, and your preference. Detailed DIY jewelry-making tutorials for each jewelry-making technique follow.
We recommend first having a look at each method before deciding which jewelry-making technique you would like to try. Next, gather the supplies you need, plan your beaded pattern, and make your own wearable beaded art!

Related: Beaded Felt Flower Lei Necklace Tutorial
1. How to Start and Finish an Infinity Necklace or Bracelet
Infinity Jewelry Making Materials
An infinity necklace or bracelet is the easiest way to make a necklace. An infinity necklace is a never-ending loop without a clasp. All you need to do is tie a knot, and you are good to go. No clasp is needed.
You will need the beads and bead stringing materials listed below to make an infinity necklace or bracelet without a clasp. If you are making a bracelet, use the stretch cord. Otherwise, you can not remove the bracelet once you have tied it.
Infinity Necklace or Bracelet Tutorial
Use a monofilament line (fishing string), a beading needle and thread, or a stretchy cord to make an infinity necklace. Tie a double or triple knot at one end of the line, or tie a knot around a small seed bead to get started. Next, string enough beads onto the line, thread, cord, or string to make a necklace or bracelet.
If you are making a bracelet or a necklace that you can not slip over your head, you will need to use a stretchy cord

To finish, tie the necklace or bracelet together. Make sure you start with a section of fishing string or stretch cord at least 6 inches longer than the length of the necklace or bracelet you intend to make.
How to make an infinity necklace or bracelet
- Tie a double or triple knot at one end of the fishing line, beading thread, or stretch cord.
- String beads onto the fishing string, beading thread, or stretch cord.
- Tie the ends of the monofilament line, beading thread, or stretchy cord together to finish your infinity necklace or bracelet.
Click on the link to see an example of some infinity acorn marble necklaces that my daughter and I made!
Sometimes, you can hide the infinity necklace or bracelet knot in a large bead hole. The photos below show how we hid the knot inside one of the wooden beads in a wooden bead bracelet that my daughter made. Click on the link to see the complete step-by-step tutorial.
2. How to Start and Finish a Necklace or Bracelet with Clamshell Knot Covers
Clamshell Knot Cover Materials
Clamshell Knot Cover Tutorials
Follow the step-by-step directions to start and finish a clamshell necklace or bracelet.
How to Start a Clamshell Necklace or Bracelet
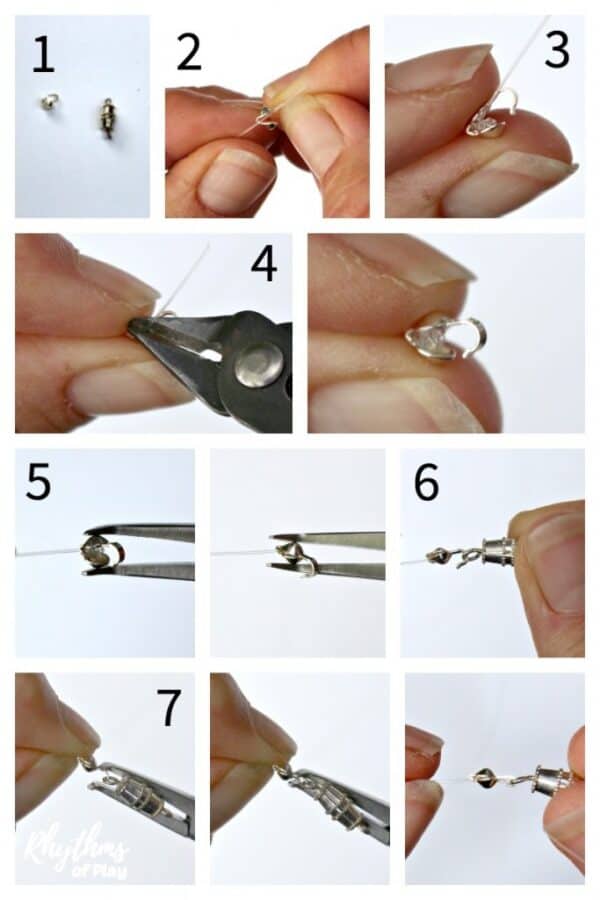
- Gather clamshell knot cover materials. The photo tutorial below shows a single clamshell knot end
and barrel clasp
. You will need two clamshell knot covers per necklace or bracelet.
- Cut beading line
at least 6 inches longer than the necklace length you will be making. Place a clamshell knot cover onto the line, as shown in #2 in the step-by-step photo tutorial below.
- Tie a knot and place the knot inside the clamshell knot cover. The knot must be small enough to fit inside the clamshell once it is closed, and it also must be large enough to stay within it. In other words, tie a big knot to keep it from pulling out the back of the clamshell while making sure that it is small enough to fit inside.
- Trim off the excess beading line with a pair of beading scissors.
- Place a drop of jewelry glue on the knot in the clamshell knot end. (optional)
- Use bent needle nose pliers to close the clamshell knot cover around the knot.
- Place a clasp onto an open loop of the clamshell knot end.
- Use bent needle nose pliers to close the open loop of the clamshell knot cover around the clasp to secure it.

More Clam Shell Knot Cover with Crimp Bead Options
Another option is to start and finish a beaded bracelet or necklace with clamshell knot covers by tying the monofilament cord or beading thread around a small seed bead before closing the clamshell knot cover around it. Once again, using a drop of jewelry glue is optional to ensure the knot and seed bead are secure.
And finally, start and finish a beaded bracelet or necklace by placing a crimp bead on the monofilament or fishing line and close the clamshell knot cover over the crimp bead to secure it. This technique also requires crimping pliers to adhere the crimp beads to the fishing line.
How to Finish a Clamshell Knot Cover Necklace or Bracelet
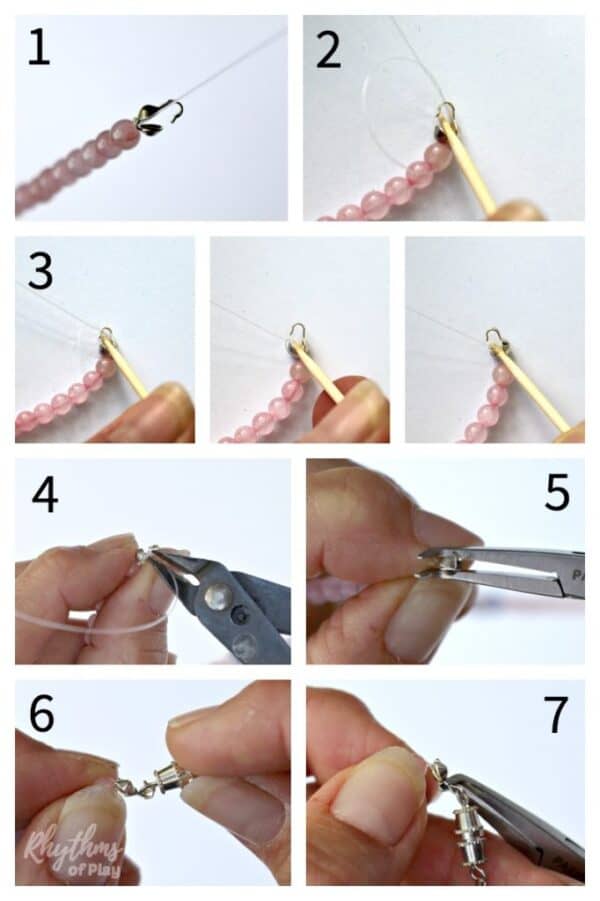
- Place the clamshell knot cover onto one end of the monofilament beading line or fishing string, as shown in the photo below.
- Tie a knot in the remaining monofilament beading line. Place a toothpick inside the loop of the knot inside the clamshell knot cover.
- Slowly pull the knot to sit inside the clamshell knot cover. Secure the clamshell (with the knot) as close to the beads on the necklace as possible. In other words, remove the gap between the clamshell cover and the beads on the necklace.
- Trim off the excess monofilament beading line or fishing string.
- Place a drop of glue on the knot inside the clamshell cover. (optional)
- Use bent needle nose pliers to close the clamshell around the knot.
- Place a clasp onto the open loop of the clamshell knot cover.
- Use bent needle nose pliers to close the loop of the clamshell to secure the knot inside the clamshell knot cover.
Related: How to Make a Beaded Windchime
3. How to Start and Finish a Necklace or Bracelet with Crimp Beads and Pliers
Crimp Bead Necklace Materials
Crimp Bead Tutorials
Follow the step-by-step directions to start and finish a beaded necklace or bracelet with crimping pliers and crimp beads.
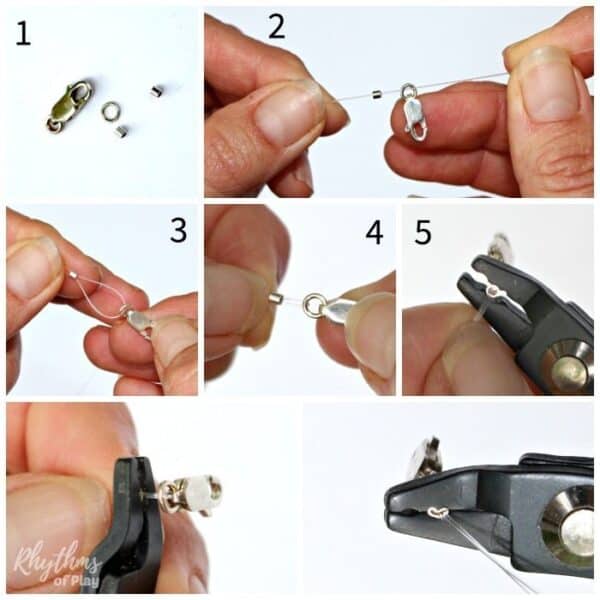
How to Start a Necklace or Bracelet Using Crimp Beads
- Gather the jewelry-making materials listed above. The photo shows the lobster clasp and jump ring option. However, barrel clasps, toggle clasps, a sterling silver dolphin clasp with a sterling silver closed jump ring
, or S-hook clasps with closed jump rings can be substituted. Switch out the proper hardware to use other types of clasps and toggles, and you will be good to go.
- Cut a section of beading line at least 6 inches longer than the length of the necklace or bracelet you will be making. Place a crimp bead or tube and then a clasp onto one end of the line.
- Tuck the loose end of the fishing line into and through the crimp bead or tube to create a loop.
- Decrease the loop size by pushing the crimp bead toward the clasp.
- Use crimp pliers to close the crimp bead and secure it to the beading line. See step by step photo tutorial below.
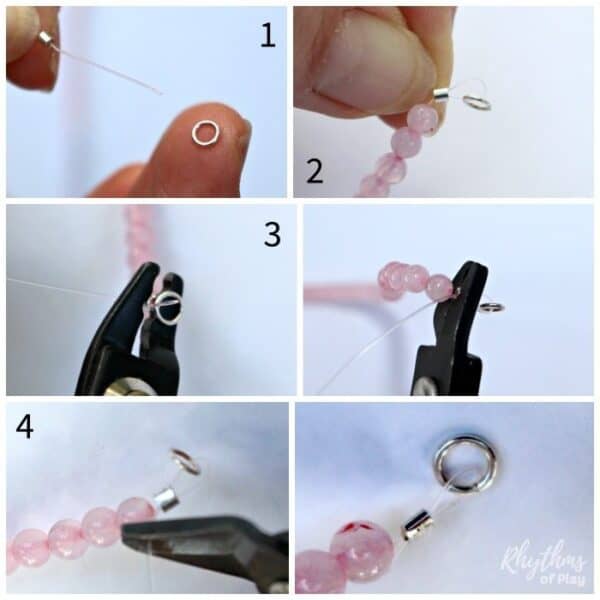
How to Finish a Necklace or Bracelet Using Crimp Beads:
- Place a crimp bead or tube
on the end of the necklace and add a jump ring.
- Insert the loose end of the necklace into the crimp bead. Decrease the size of the loop by moving the crimp bead as close to the beads on the necklace as possible.
- Use crimp pliers to close the crimp bead and secure it to the beading line or necklace.
- Trim away excess beading line with scissors.
The directions above share tutorials that will help you learn how to start and finish a beaded necklace or bracelet.
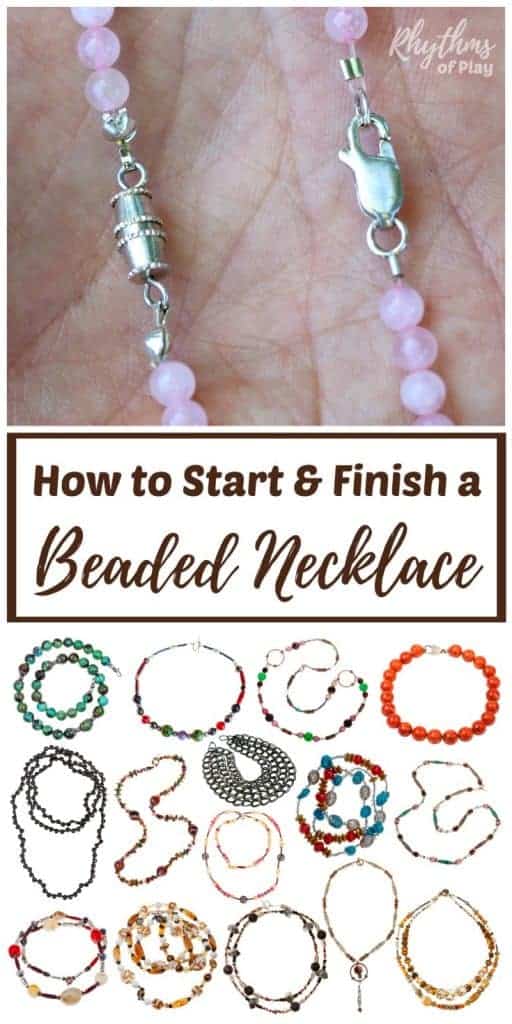
The necklace on the left is made using clamshell knot covers in the photo below, while the necklace on the right is made with crimp beads and pliers, but specialty clasps can be substituted with the basic clasp types pictured throughout this article.
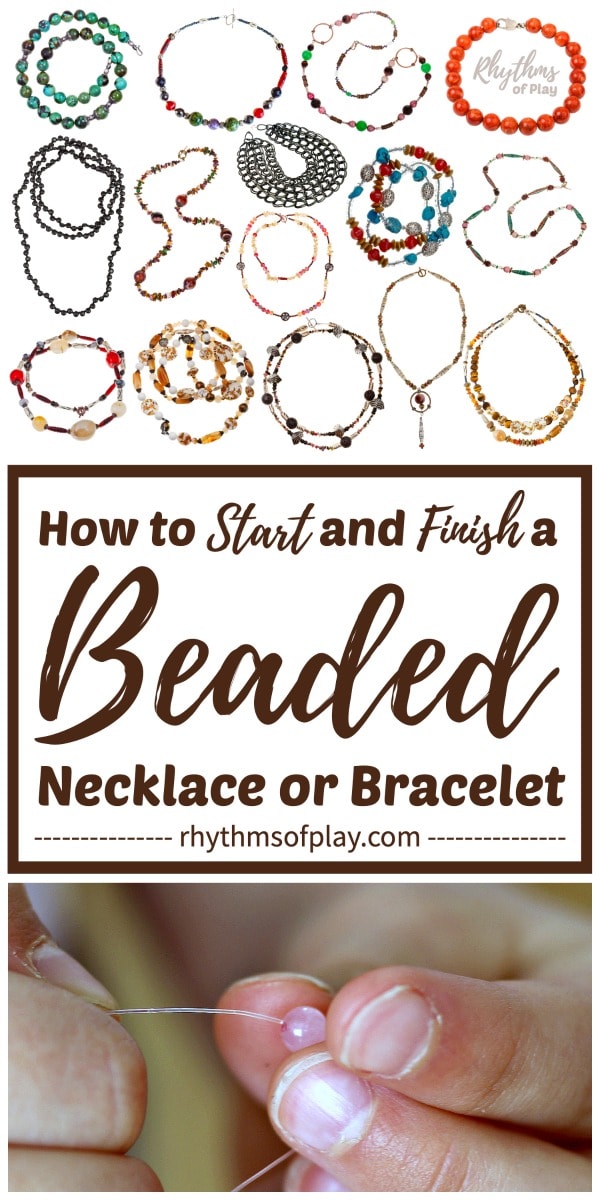
There are millions of types of beads that you can use to create beaded jewelry. A few examples can be found below.
How to Make a Beaded Necklace: Bead Options for Stringing Necklaces and Bracelets
There are millions of types of beads that can be used to string necklaces and bracelets, and I have included a few of our favorite basic options below.
Young children should string beads that are at least 8mm and up. Small hands still working on fine motor control have trouble with smaller beads.
Related: How to Color Wooden Beads
Homemade Beading Projects to Try Now
Below you will find links to the beading projects we have made. We will add to this list as we make more jewelry tutorials. I didn't want to describe how to start and finish a necklace or bracelet for each post, so I figured I'd start with this one–lol–enjoy!
Fun DIY Beaded Necklace Ideas
- DIY Personalized Name or Word Necklace
- Mom Necklace Gift Idea
- Mother-Daughter Necklace or Bracelet Set
- Alphabet Necklace
- Beaded Felt Flower Lei Necklace
Easy Beaded Bracelet Tutorial
- Wooden Bead Bracelets
- Painted Wooden Spool Bracelet
DIY Necklaces with Homemade Charms
- Acorn Marble Necklace
- DIY Picture Necklace Photo Jewelry
- Fingerprint Art Necklace
- Thumbprint Heart Necklace
- Fingerprint Flower Necklace
- Painted Wooden Spool Necklace
Other Beading Projects to Try
- DIY Sea Glass Wind Chime
- Sea Glass Suncatchers
- Rainbow Pony Bead Prism Suncatcher
- Heart Prism Pony Bead Suncatcher
- Snowflake Ornaments
Beginning Jewelry Making Tutorials for Kids and Adults
I hope you enjoyed these DIY jewelry-making tutorials and simple ideas for beginners. Use this easy step-by-step jewelry-making tutorial to learn how to start and finish a beaded necklace or bracelet.
Have any questions or other tutorials you'd like me to write? Leave a comment below or use the contact button at the top of the page.
Learn more about us HERE–> Rhythms of Play
If you Like DIY Jewelry Making, You May Also Like
- Homemade Gifts Kids Can Make
- How to Sew a Pocket Pet Mouse
- Fingerprint Art Magnets
- How to Color Wooden Beads
winderseentiourcio.blogspot.com
Source: https://rhythmsofplay.com/how-to-start-and-finish-a-beaded-necklace-or-bracelet/
0 Response to "Easy Way to Pit on a Bracelet With a Big Clasp"
Post a Comment